共计 4771 个字符,预计需要花费 12 分钟才能阅读完成。
FramePack 是一个渐进式生成视频的下一帧(下一帧部分)预测神经网络结构。
FramePack 将输入上下文压缩为恒定长度,以便生成工作量不受视频长度的影响。
即使在笔记本电脑 GPU 上,FramePack 也可以使用 13B 模型处理大量帧。
FramePack 可以使用更大的批量大小进行训练,类似于图像扩散训练的批量大小。
视频扩散,但感觉像图像扩散。
GitHub 原文地址:https://github.com/lllyasviel/FramePack?tab=readme-ov-file
")
项目要求 cuda12.6+pytorch2.6
- 打开 PowerShell 或 CMD
- 输入:
python✅ 这时你的命令行前面应该出现:
>>>像这样,表示进入了 Python 解释器!
- 然后再输入:
import torch
print(torch.__version__)
print(torch.version.cuda)
print(torch.cuda.is_available())
print(torch.backends.cudnn.enabled)
✅ 这样 Python 就能正确执行这些命令,告诉你 PyTorch 的真实版本、CUDA 版本、GPU 是否可用!
- 你用了
--index-url https://download.pytorch.org/whl/cu126 - 但目前官方根本没有提供 cu126 的 wheel 包(.whl)
- 所以 pip 自动 fallback 到默认已有的版本(2.2.0+cu118),因为 cu126 目录里根本找不到新包!
简而言之:
✅ 你的指令执行了,但其实没有安装到正确版本。
✅ 你现在本机是 PyTorch 2.2.0(CUDA 11.8 版),而不是你想要的 PyTorch 2.6.0(CUDA 12.6 版)。
历史 pytorch 下载地址:https://download.pytorch.org/whl/
🛠 现在正确的做法是:
1. 卸载老版本
先清除已经安装的旧版本:
pip uninstall torch torchvision torchaudio -y确认全部卸载干净。
2. 安装 Nightly(开发版)PyTorch 2.6.0(支持 CUDA 12.1)
正确安装命令是:
pip install --pre torch torchvision torchaudio --index-url https://download.pytorch.org/whl/nightly/cu121解释:
--pre预发布版(2.6.0.dev 版本)nightly/cu121➔ 目前 PyTorch 最高只到 CUDA 12.1- 你的 CUDA 12.6 驱动可以兼容运行 CUDA 12.1 的 runtime
✨ 这样安装完后,验证环境:
进入 Python,执行:
import torch
print(torch.__version__)       # 应该显示 2.6.0.devxxxx
print(torch.version.cuda)      # 应该是 '12.1'
print(torch.cuda.is_available()) # 应该是 True
✅ 如果这样输出没问题,就能顺利跑 FramePack 项目了
📢 为什么没有 cu126 目录?
| 项目 | 说明 |
|---|---|
| 官方 PyTorch Nightly 版 | 目前只构建到 cu121(CUDA 12.1 支持版) |
| CUDA 12.6 支持 | 需要未来 PyTorch 2.6 正式版发布后,才可能有 cu126 正式版 wheel 包 |
| 现在解决方法 | 装 cu121 版就能兼容你的 CUDA 12.6 驱动,能正常跑 FramePack |
🎯 小总结
| 需求 | 正确操作 |
|---|---|
| 需要 PyTorch 2.6 + CUDA 12.6 | 安装 PyTorch 2.6 Nightly 版 cu121 支持 |
| 安装命令 | pip install –pre torch torchvision torchaudio –index-url https://download.pytorch.org/whl/nightly/cu121 |
| 兼容性 | CUDA 12.6 驱动能向下兼容 CUDA 12.1 runtime |
📢 小提醒(非常重要)
- 你的 CUDA 驱动是 12.6,PyTorch runtime 是 12.1,没有问题,因为 驱动版本 >= Runtime 版本就可以。
- 目前你用的是 Nightly 版 PyTorch(2.6.0.dev),属于开发版,可能未来有小变化,但可以完全满足 FramePack 的运行需求。
- 如果 FramePack 项目有
triton相关依赖,还需要额外安装 Triton Nightly 版(如果后面遇到,告诉我帮你补充命令)。
请注意,模型将自动下载。您将从 HuggingFace 下载超过 30GB 的数据。
")
")
")
Win 安装包
https://github.com/lllyasviel/FramePack/releases/download/windows/framepack_cu126_torch26.7z
下载后,解压,使用 update.bat 更新,使用 run.bat 运行。
请注意,运行 update.bat 很重要,否则您可能会使用未修复潜在错误的先前版本。
记得搭梯子,否则无法下载。
问题解决办法 1:我遇到的问题,直接运行 run.bat 会报错 503 等各种错误。(不如方法 2)
异常:无法启动应用程序,因为“http://127.0.0.1:7860/gradio_api/startup-events”失败(代码 503)。
我在系统 环境中更新 python cuda pytorch gradio 都不管用。
最后才发现问题,下载的一键安装包里面有单独的 python 环境(我是菜鸡,真不懂代码和环境部署)。
首先安装对应版本的 gradio。
PS F:\github\framepack_cu126_torch26\system\python> F:\github\framepack_cu126_torch26\system\python\python.exe -m pip install "gradio>=4.44.1,<5.0.0"开启全局代理,直接运行以下命令。(根据自己存放位置替换路径)
F:\github\framepack_cu126_torch26\system\python\python.exe F:\github\framepack_cu126_torch26\webui\demo_gradio.py --server 0.0.0.0 --port 7865 --share这些是用来加速的,不安装也没关系。
")
临时 72 小时外链可以正确打开,本地
http://0.0.0.0:7865/
依旧无法访问(不知道原因)。总是提示端口问题,但是也没占用,全局代理 /pac 代理全试过了。
")
")
总算是运行起来 UI 界面了。
切记,得用安装包内的 python 环境运行,直接用系统的白搭,瞎折腾。
解决办法 2 (推荐,很管用)
")
GitHub 讨论问题区:https://github.com/lllyasviel/FramePack/issues?q=is%3Aissue%20state%3Aopen%20503
")
在 run.bat 文件前面加入这句:
set NO_PROXY="127.0.0.1;localhost"")
在环境变量中增加 set HF_ENDPOINT= https://hf-mirror.com 也可以解决模型下载的问题。
编辑 environment.bat 在文件中增加
set HF_ENDPOINT=https://hf-mirror.com即可。或者
")
在 framepack\webui\demo_gradio.py 文件中加入这一行代码
刚试了可以下很快
os.environ["HF_ENDPOINT"] = "https://hf-mirror.com"Graido 在启动时会自检 block.launch()调用内部会用 httpx 向
http://127.0.0.1:7860/gradio_api/startup-events 发送一次 GET 请求,确认本地 Web UI 已经正常跑起来,你的机器上大概率是系统或者终端设置了全局代理(httpx 默任会“信任环境变量”),所以并没有直连 127.0.0.1,前面转发给了代理服务器,代理服务器的目标是 127.0.0.1 自然连不上。一步到位就直接关闭对机地址走代理
")
解 决办法3(未实践测试)
pip install torchvisionThis resolve this issue on my PC ;-)
加速模块未安装
")
✅ 安装 Xformers(强烈推荐)
进入 FramePack 自带 python 环境,执行:
F:\github\framepack_cu126_torch26\system\python\python.exe -m pip install xformers注意事项:
- xformers 一定要版本对 CUDA、PyTorch 适配
- 你是 CUDA 12.6 + PyTorch 2.6.0 的环境
→ 直接pip install xformers通常会拉取适配 wheel
⭕ 安装 Flash Attention(有条件再装)
Flash Attention 要求:
- CUDA 11.8+(你有 12.6 ✅)
- 显卡必须是 A100 / H100 / 4090 / L40 / H20 / RTX40 系列
如果满足,可以试着安装 Flash Attention 2:
F:\github\framepack_cu126_torch26\system\python\python.exe -m pip install flash-attn --index-url https://pypi.nvidia.com注意:如果显卡不支持,会爆错(不用担心,不装也可以跑 FramePack)。
❌ Sage Attention
Sage 目前极度不稳定、几乎没人用,不建议装。FramePack 也不依赖它核心功能。
很多人会问如何写出更好的提示。
下面是我个人经常用来获取提示的 ChatGPT 模板:
You are an assistant that writes short, motion-focused prompts for animating images.
When the user sends an image, respond with a single, concise prompt describing visual motion (such as human activity, moving objects, or camera movements). Focus only on how the scene could come alive and become dynamic using brief phrases.
Larger and more dynamic motions (like dancing, jumping, running, etc.) are preferred over smaller or more subtle ones (like standing still, sitting, etc.).
Describe subject, then motion, then other things. For example: "The girl dances gracefully, with clear movements, full of charm."
If there is something that can dance (like a man, girl, robot, etc.), then prefer to describe it as dancing.
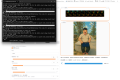
Stay in a loop: one image in, one motion prompt out. Do not explain, ask questions, or generate multiple options.您将指令粘贴到 ChatGPT,然后向其输入图像以获得如下提示:
")
实测很慢。。。。。。1 个小时才生成 11S-13S 视频(FPS-30)。16G、4060ti 显卡。
")